> ## Documentation Index
> Fetch the complete documentation index at: https://manus.im/docs/llms.txt
> Use this file to discover all available pages before exploring further.
# Design View
> Manus Design View is a powerful extension of the Manus agent that transforms your creative process into a seamless AI design workflow, giving you granular control over every detail.
## What is Design View?
Design View is an integrated feature that allows for complex, multi-step visual workflows. Instead of starting from scratch with every new prompt, you can make precise edits to existing images, ensuring consistency and saving valuable time. Whether you're designing a poster, creating a mood board, or refining a product shot, Design View acts as your creative partner, understanding your intent from start to finish. It is powered by Google's advanced Nano Banana Pro image generation model, ensuring high-quality, photorealistic results.
## How to Use Design View
Using Design View is an intuitive process that combines simple prompts with powerful editing tools. Here’s how you can get started:
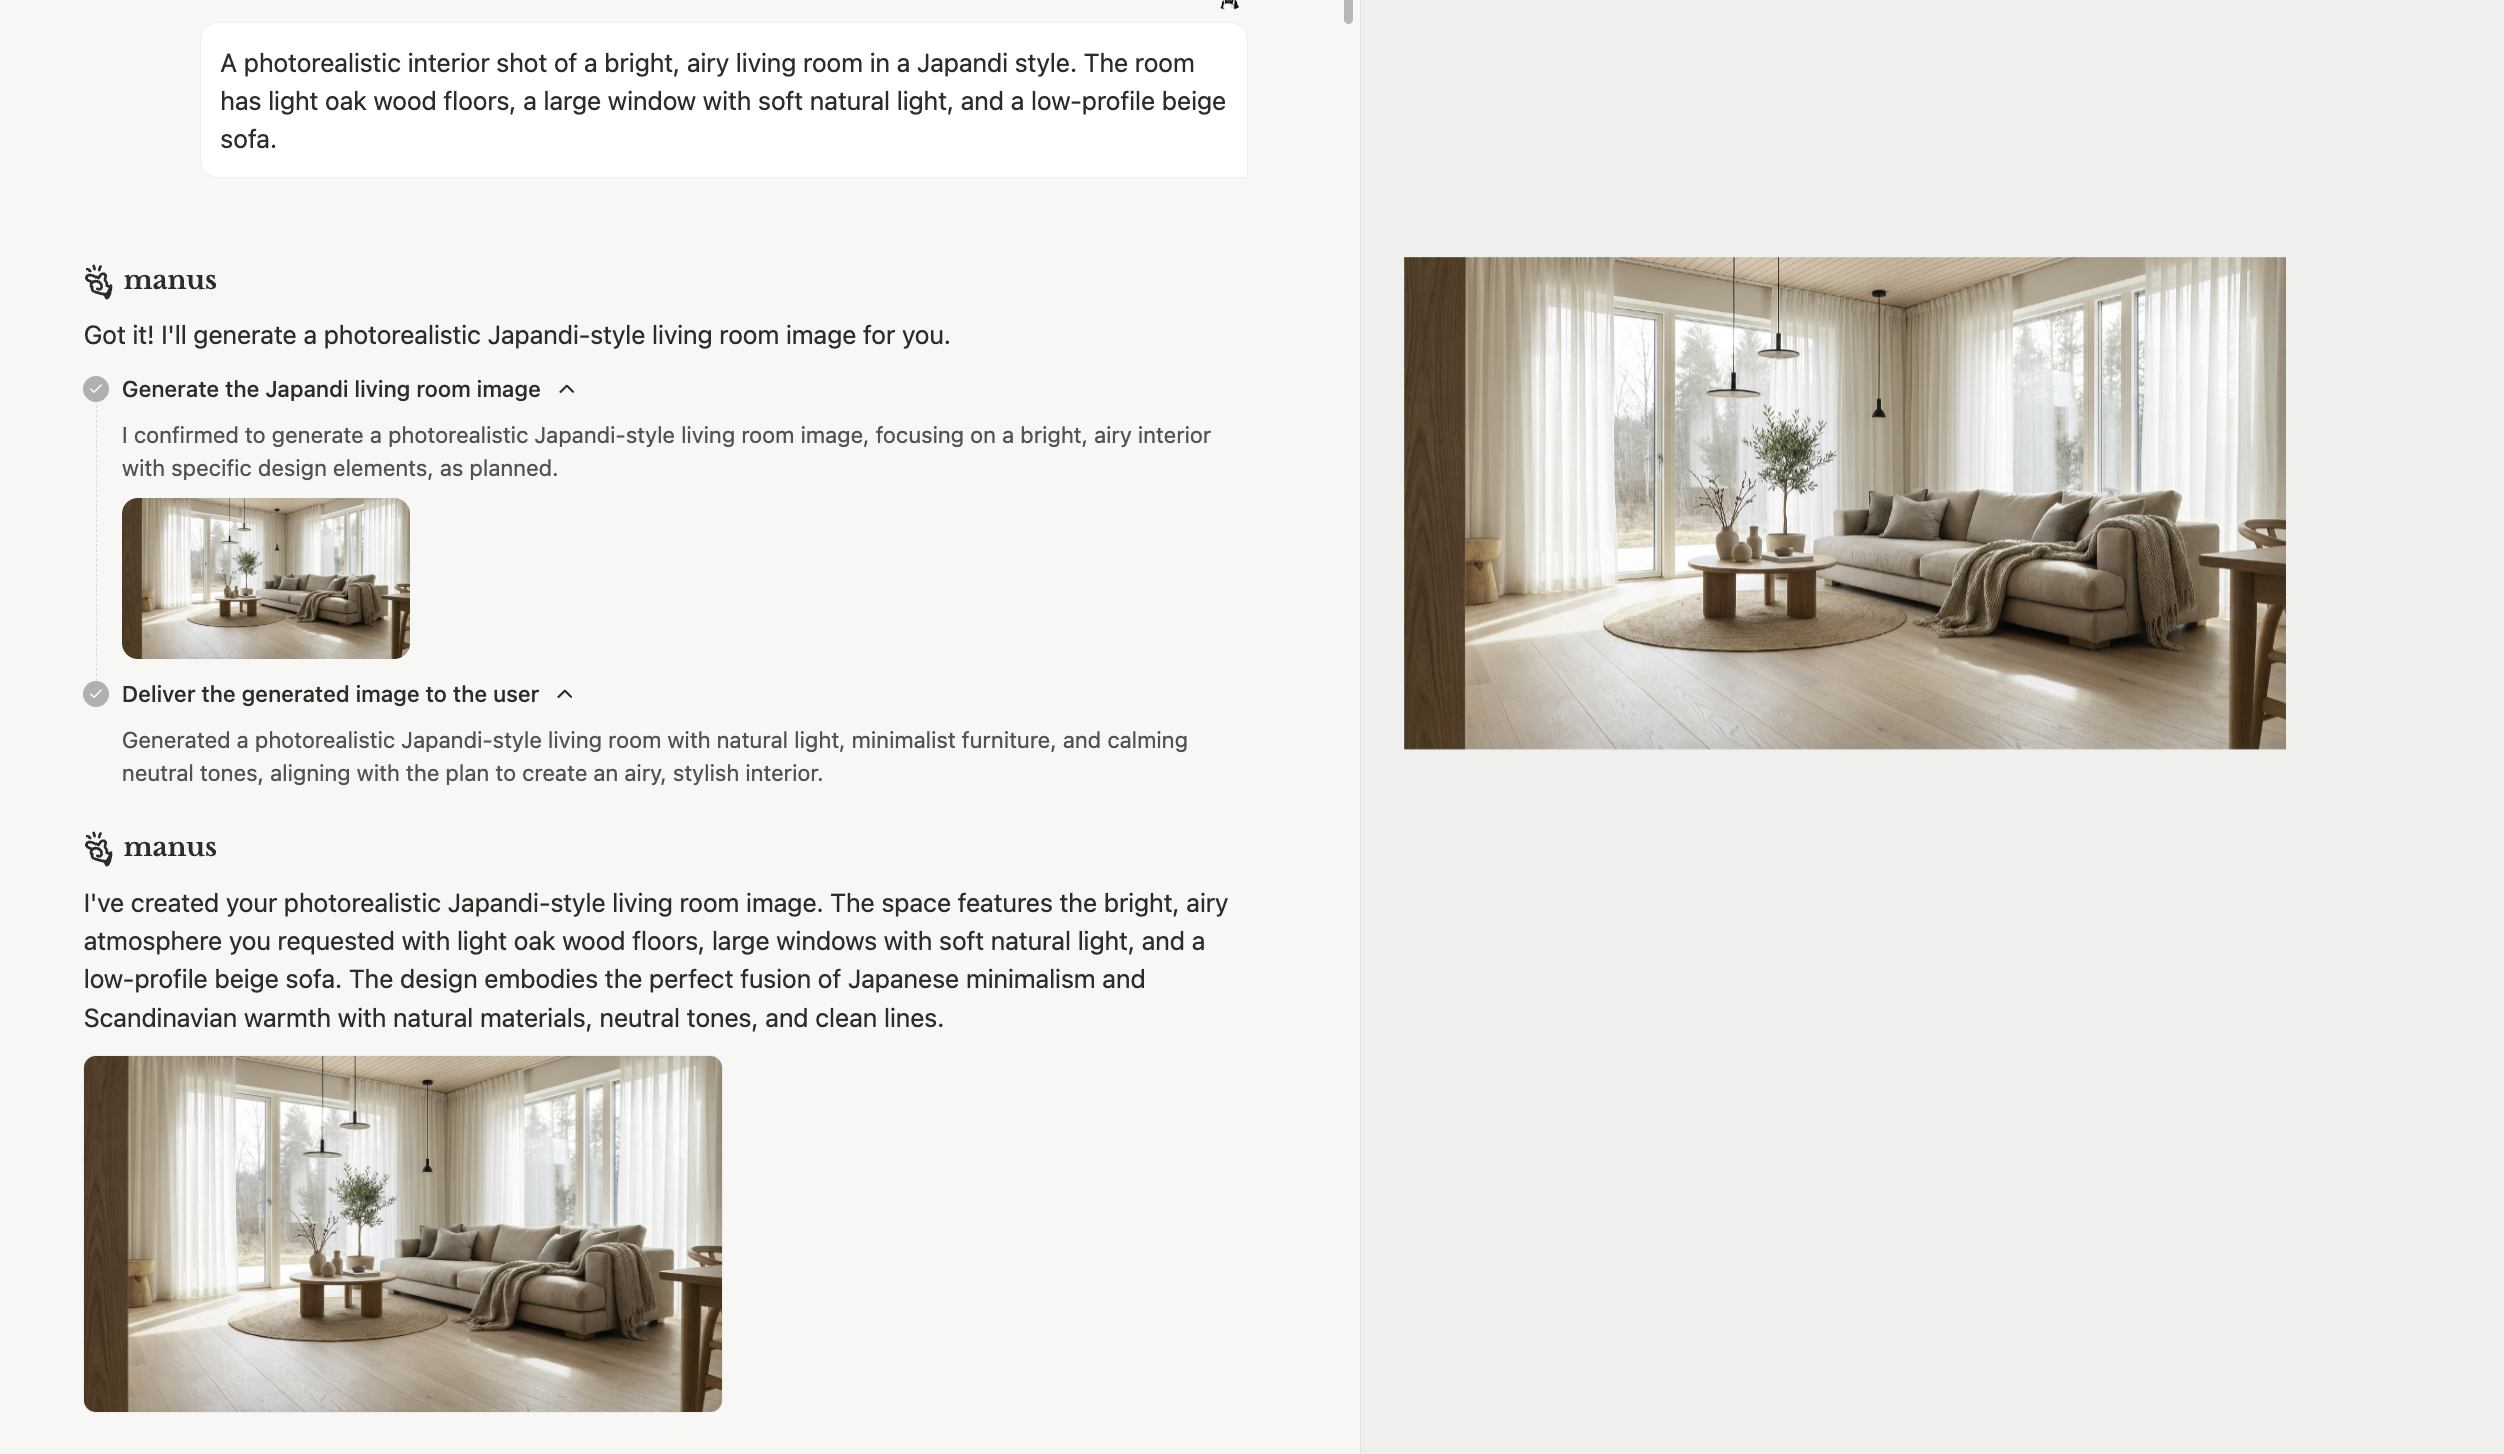
### Step 1: Generate Your Initial Concept
Begin by giving Manus a simple prompt to generate your base image.
```
A photorealistic interior shot of a bright, airy living room in a Japandi style. The room has light oak wood floors, a large window with soft natural light, and a low-profile beige sofa.
```
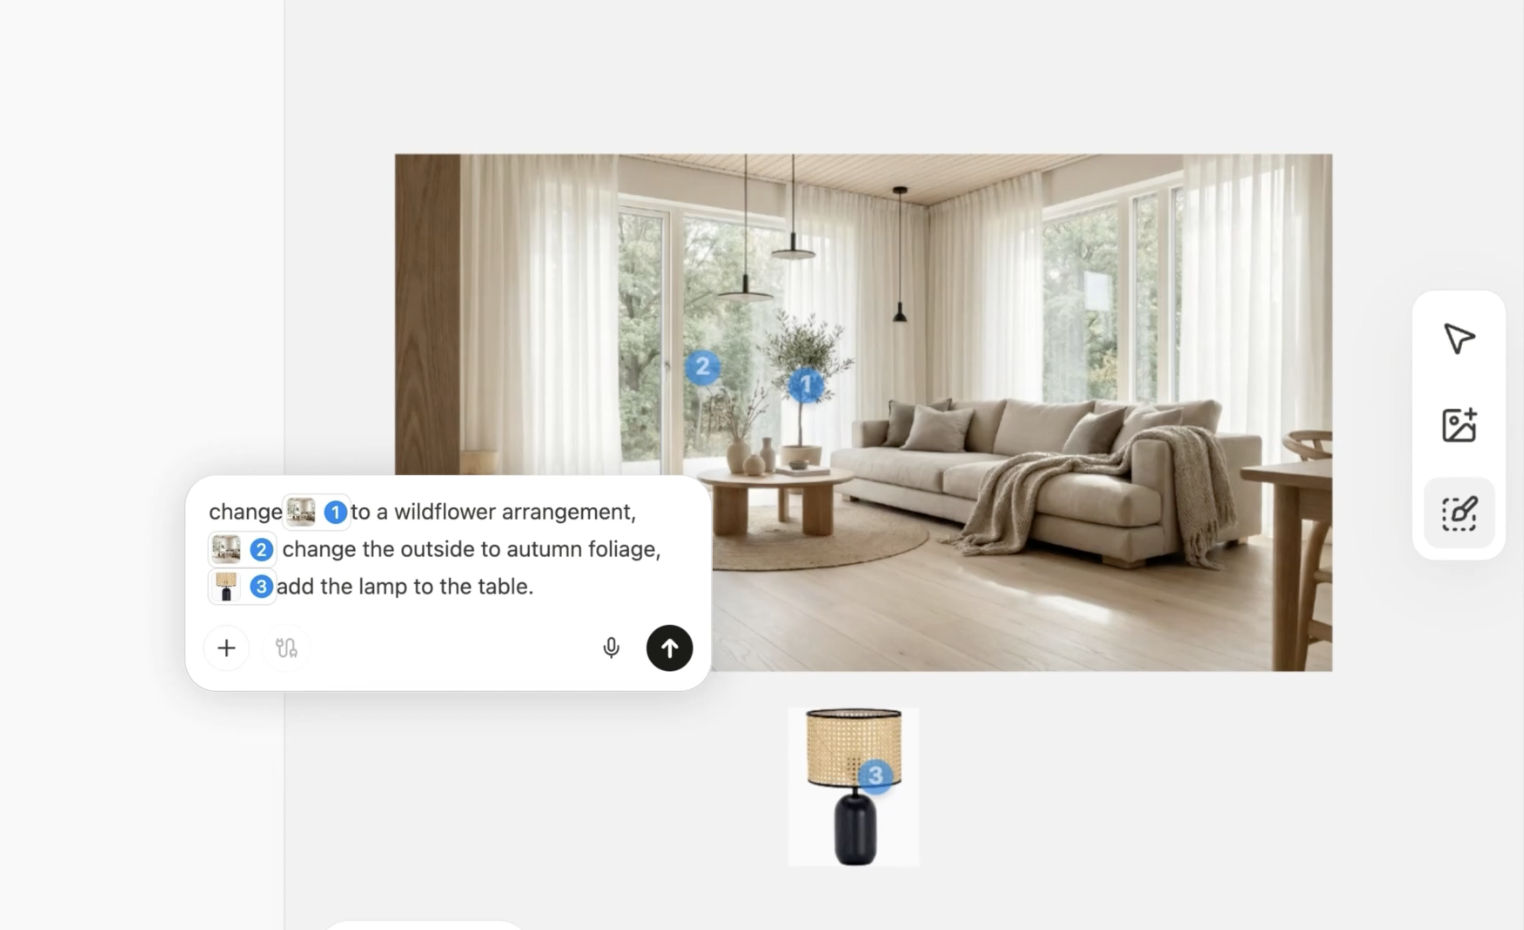
### Step 2: Refine with the Mark Tool
Once you have your initial image, you can use the **Mark Tool** to make precise edits. Instead of writing a new prompt and hoping for the best, you can select specific elements and provide instructions for how to change them.
1. Click the **\[Mark]** tool in the Design View interface. 2. Select the element you want to modify (e.g., a sofa, a plant, a window). 3. Provide a clear and concise instruction for the change.
For example:
\* Select the sofa: `Change this to a muted sage green.` \* Select the plant: `Change this to a wildflower arrangement.` \* Select the window: `Change the leaves to autumn foliage.`
2. Reference Images: You can add elements to your design by providing a reference image. For example, you can add a specific lamp to a room by uploading an image of it.
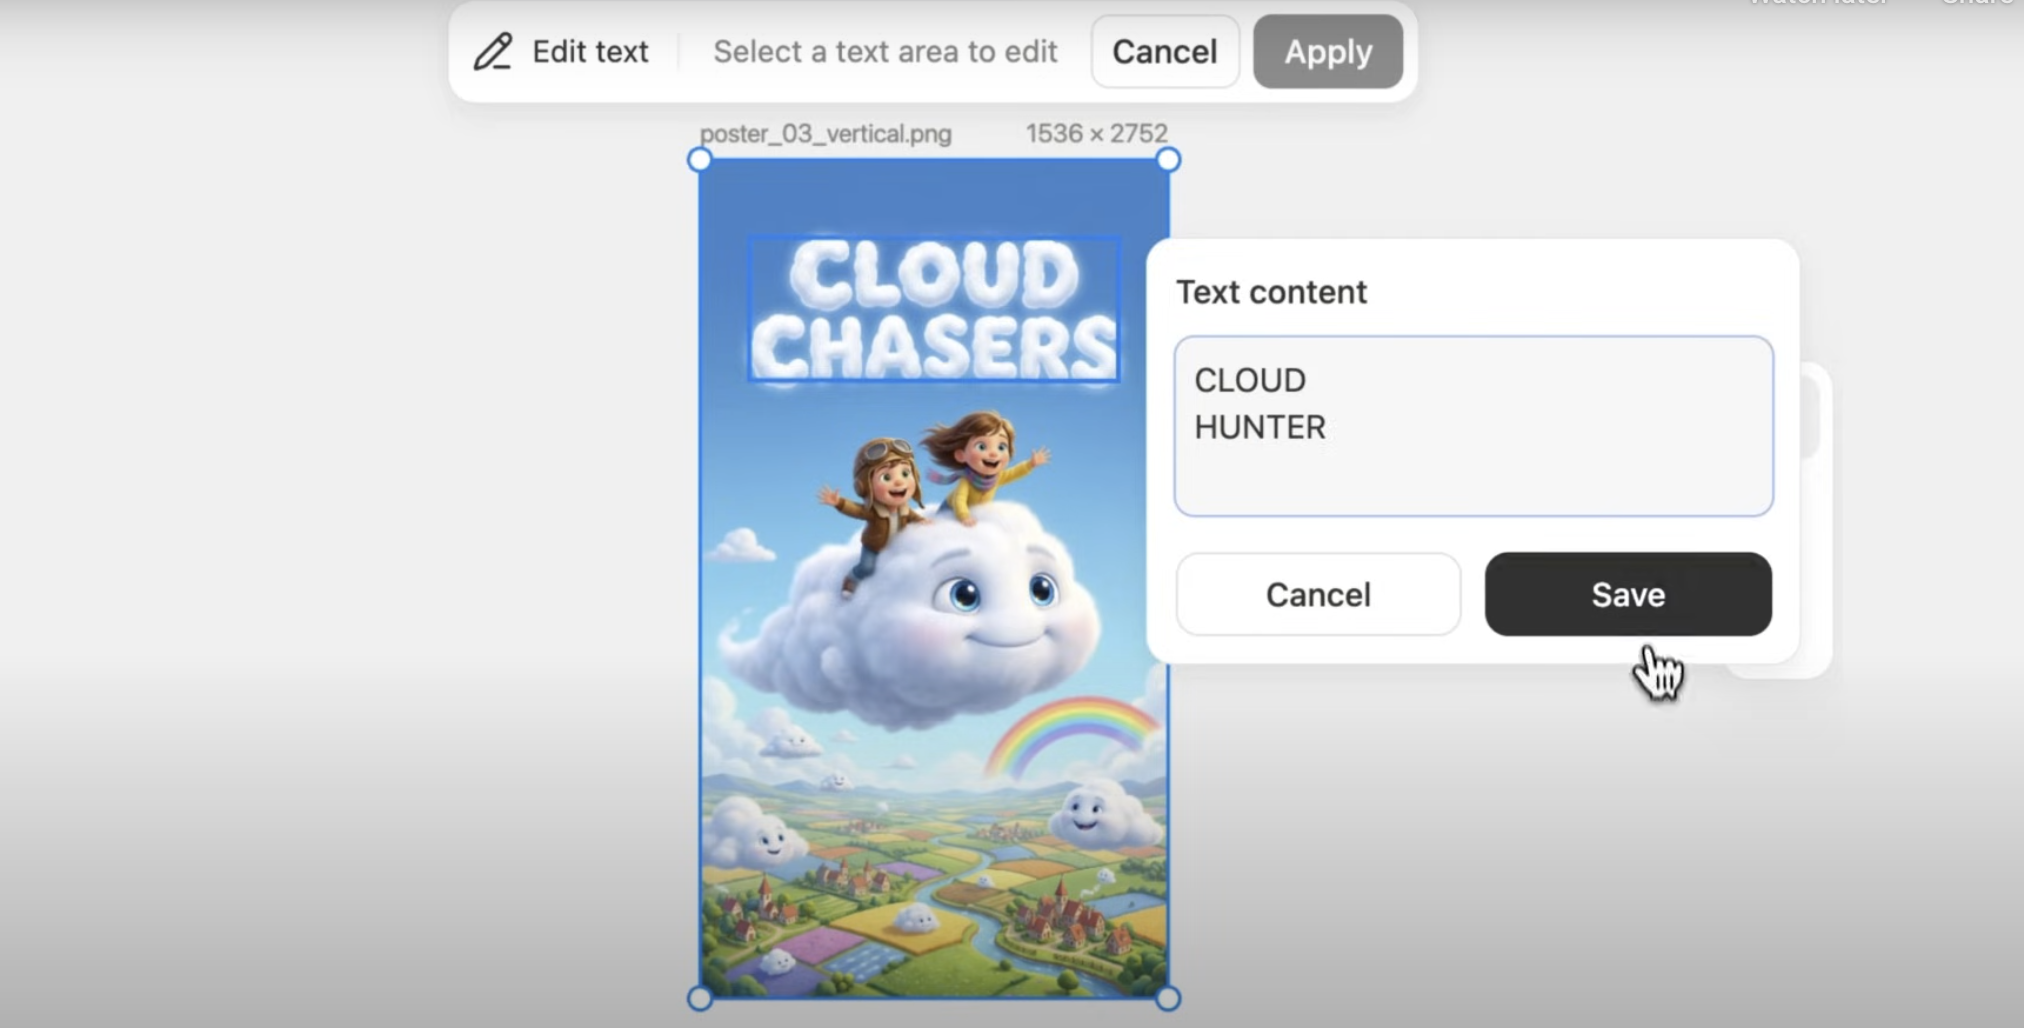
### Step 3: Edit Text Elements
If your design includes text, such as on a poster or in an infographic, you can easily edit it without disturbing the rest of the image. Click on **"edit text"** and Manus will extract all text elements, allowing you to make changes with ease.
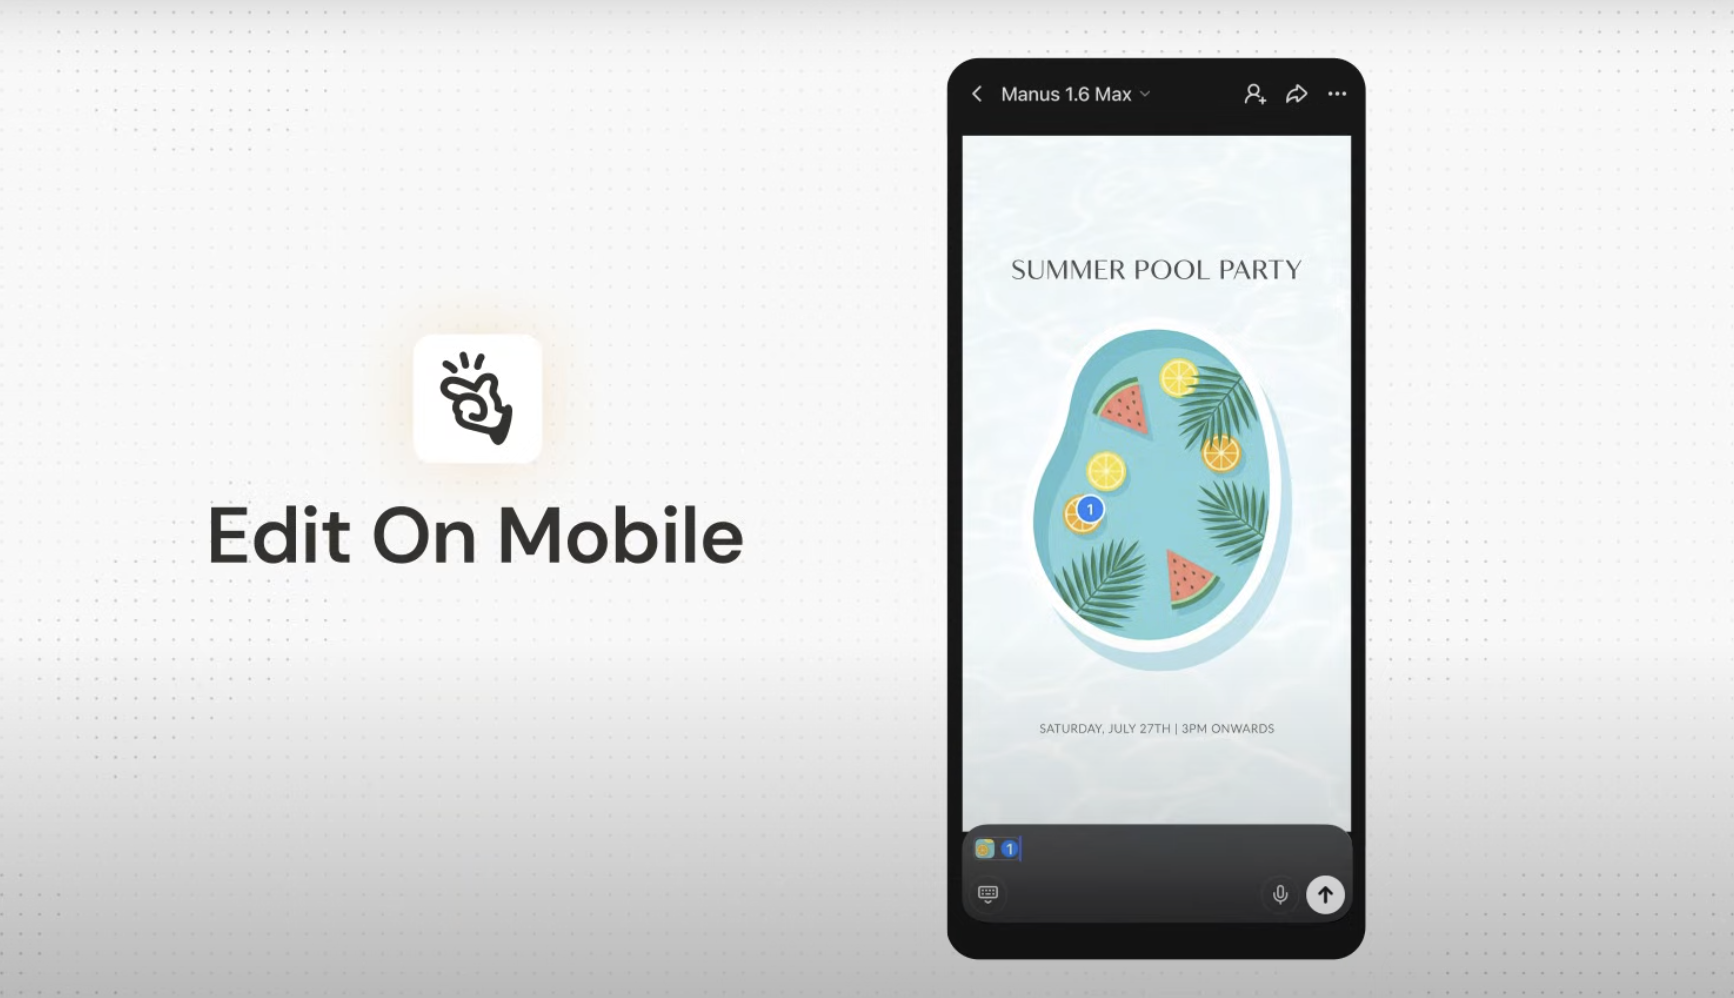
### Mobile Editing
Design View is also available on the Manus mobile app, so you can continue your work on the go.
**Press and Hold to Mark**: Simply press and hold on any area of an image to create a selection. **Voice or Text Input**: Once an area is marked, you can either type your changes or use your voice to record instructions. \
**Batch Your Edits**: Mark multiple areas on an image, add an instruction for each, and send them all to be processed in a single batch.
## What You Need to Know
**Integrated Workflow**: Design View is not a standalone tool; it is an integrated capability of the Manus agent. This allows for a seamless transition between generating ideas, refining visuals, and incorporating them into larger projects.
**Precision and Control**: The Mark Tool gives you a level of control that is not possible with traditional prompting. You can change specific elements of an image without affecting the overall composition, lighting, or style.
## Tips for Better Results
| Tip | Description |
| ------------------------------------- | ---------------------------------------------------------------------------------------------------------------------------------------------------------- |
| **Be Specific with Instructions** | When using the Mark Tool, provide clear and direct instructions. For example, instead of saying "make this better," say "change the color to a deep blue." |
| **Use High-Quality Reference Images** | When adding elements from a reference image, use a high-quality image with a clear subject for the best results. |
| **Start with a Good Base Image** | The better your initial image, the easier it will be to refine. Spend some time crafting a good initial prompt to get a strong starting point. |
| **Iterate and Refine** | Don't be afraid to make multiple small changes to get your image just right. The power of Design View is in its iterative workflow. |
## Common Questions
Design View is powered by Google's Nano Banana Pro, a cutting-edge image generation model
Design View is not a standalone tool; it is an integrated capability of the Manus agent that allows for complex, multi-step visual workflows. The key difference is the ability to make precise, in-context edits to existing images, rather than regenerating a new image from scratch with every prompt.
Yes, Manus Design View is available to all Manus users.
 Begin by giving Manus a simple prompt to generate your base image.
```
A photorealistic interior shot of a bright, airy living room in a Japandi style. The room has light oak wood floors, a large window with soft natural light, and a low-profile beige sofa.
```
### Step 2: Refine with the Mark Tool
Once you have your initial image, you can use the **Mark Tool** to make precise edits. Instead of writing a new prompt and hoping for the best, you can select specific elements and provide instructions for how to change them.
1. Click the **\[Mark]** tool in the Design View interface. 2. Select the element you want to modify (e.g., a sofa, a plant, a window). 3. Provide a clear and concise instruction for the change.
For example:
Begin by giving Manus a simple prompt to generate your base image.
```
A photorealistic interior shot of a bright, airy living room in a Japandi style. The room has light oak wood floors, a large window with soft natural light, and a low-profile beige sofa.
```
### Step 2: Refine with the Mark Tool
Once you have your initial image, you can use the **Mark Tool** to make precise edits. Instead of writing a new prompt and hoping for the best, you can select specific elements and provide instructions for how to change them.
1. Click the **\[Mark]** tool in the Design View interface. 2. Select the element you want to modify (e.g., a sofa, a plant, a window). 3. Provide a clear and concise instruction for the change.
For example:
 \* Select the sofa: `Change this to a muted sage green.` \* Select the plant: `Change this to a wildflower arrangement.` \* Select the window: `Change the leaves to autumn foliage.`
2. Reference Images: You can add elements to your design by providing a reference image. For example, you can add a specific lamp to a room by uploading an image of it.
### Step 3: Edit Text Elements
\* Select the sofa: `Change this to a muted sage green.` \* Select the plant: `Change this to a wildflower arrangement.` \* Select the window: `Change the leaves to autumn foliage.`
2. Reference Images: You can add elements to your design by providing a reference image. For example, you can add a specific lamp to a room by uploading an image of it.
### Step 3: Edit Text Elements
 If your design includes text, such as on a poster or in an infographic, you can easily edit it without disturbing the rest of the image. Click on **"edit text"** and Manus will extract all text elements, allowing you to make changes with ease.
### Mobile Editing
Design View is also available on the Manus mobile app, so you can continue your work on the go.
If your design includes text, such as on a poster or in an infographic, you can easily edit it without disturbing the rest of the image. Click on **"edit text"** and Manus will extract all text elements, allowing you to make changes with ease.
### Mobile Editing
Design View is also available on the Manus mobile app, so you can continue your work on the go.
 **Press and Hold to Mark**: Simply press and hold on any area of an image to create a selection. **Voice or Text Input**: Once an area is marked, you can either type your changes or use your voice to record instructions. \
**Batch Your Edits**: Mark multiple areas on an image, add an instruction for each, and send them all to be processed in a single batch.
## What You Need to Know
**Integrated Workflow**: Design View is not a standalone tool; it is an integrated capability of the Manus agent. This allows for a seamless transition between generating ideas, refining visuals, and incorporating them into larger projects.
**Precision and Control**: The Mark Tool gives you a level of control that is not possible with traditional prompting. You can change specific elements of an image without affecting the overall composition, lighting, or style.
## Tips for Better Results
| Tip | Description |
| ------------------------------------- | ---------------------------------------------------------------------------------------------------------------------------------------------------------- |
| **Be Specific with Instructions** | When using the Mark Tool, provide clear and direct instructions. For example, instead of saying "make this better," say "change the color to a deep blue." |
| **Use High-Quality Reference Images** | When adding elements from a reference image, use a high-quality image with a clear subject for the best results. |
| **Start with a Good Base Image** | The better your initial image, the easier it will be to refine. Spend some time crafting a good initial prompt to get a strong starting point. |
| **Iterate and Refine** | Don't be afraid to make multiple small changes to get your image just right. The power of Design View is in its iterative workflow. |
## Common Questions
**Press and Hold to Mark**: Simply press and hold on any area of an image to create a selection. **Voice or Text Input**: Once an area is marked, you can either type your changes or use your voice to record instructions. \
**Batch Your Edits**: Mark multiple areas on an image, add an instruction for each, and send them all to be processed in a single batch.
## What You Need to Know
**Integrated Workflow**: Design View is not a standalone tool; it is an integrated capability of the Manus agent. This allows for a seamless transition between generating ideas, refining visuals, and incorporating them into larger projects.
**Precision and Control**: The Mark Tool gives you a level of control that is not possible with traditional prompting. You can change specific elements of an image without affecting the overall composition, lighting, or style.
## Tips for Better Results
| Tip | Description |
| ------------------------------------- | ---------------------------------------------------------------------------------------------------------------------------------------------------------- |
| **Be Specific with Instructions** | When using the Mark Tool, provide clear and direct instructions. For example, instead of saying "make this better," say "change the color to a deep blue." |
| **Use High-Quality Reference Images** | When adding elements from a reference image, use a high-quality image with a clear subject for the best results. |
| **Start with a Good Base Image** | The better your initial image, the easier it will be to refine. Spend some time crafting a good initial prompt to get a strong starting point. |
| **Iterate and Refine** | Don't be afraid to make multiple small changes to get your image just right. The power of Design View is in its iterative workflow. |
## Common Questions